Building a responsive scheduler in Angular
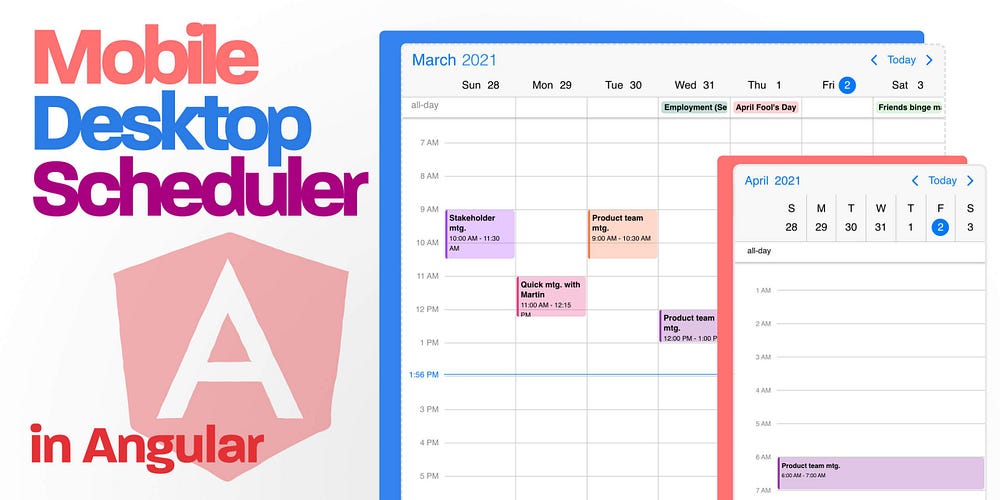
Scheduling is a task that we do for both personal reasons and for work. Let’s see how to quickly set up a weekly and daily schedule view in Angular that looks good on mobile and desktop screens as well.
What you’ll be building
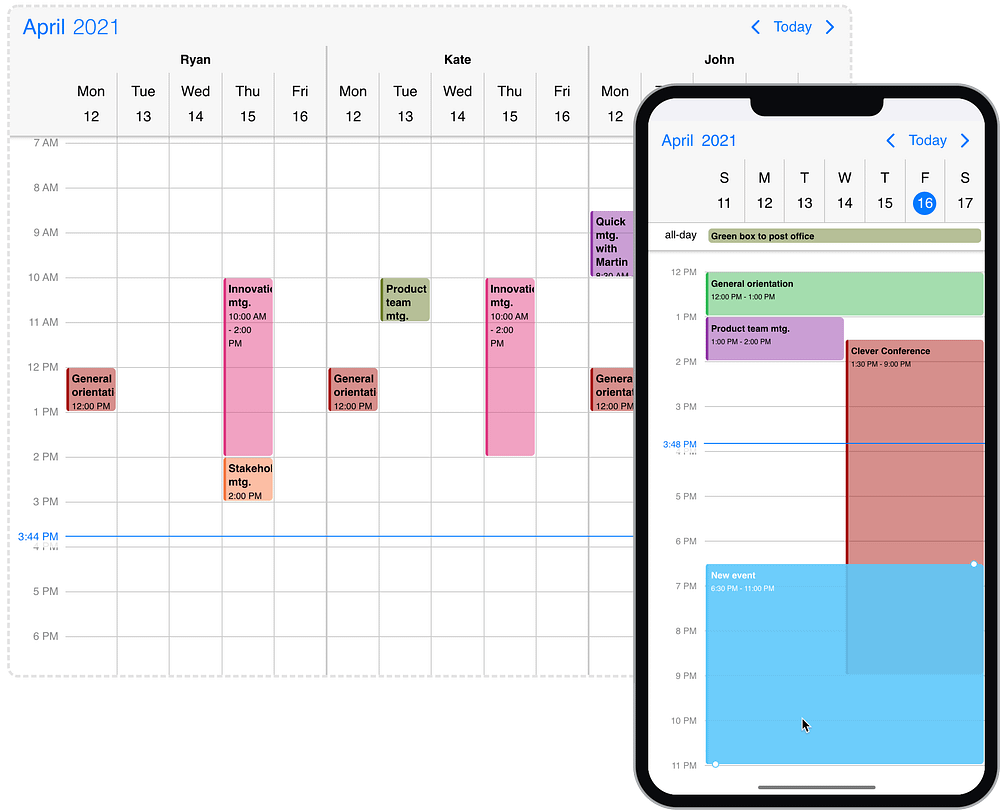
A responsive event calendar the shows the weekly schedule on larger screens and adapts to a day view on mobile screens. Events should be loaded, shown on the screen with the possibility to drag them around and resize them to change their length.
Prerequisites
The minimum required version is Angular 4 or newer (including the latest release). You will have to install Mobiscroll in your project for the examples to work. For this project we’ll be using a simple Angular CLI app.
If you’ve already have Mobiscroll installed, you can skip this step, otherwise follow this two minute guide.
Install Mobiscroll
1. Set up your account: If you don’t use the licensed version or if don’t have a running trial, you can start one for free. Make sure to remember your email address and set a password.
2. Install the Mobiscroll CLI from npm: Run the following command in the terminal.
npm install -g @mobiscroll/cli3. Install Mobiscroll: Run the config command in the root folder of your Angular app. If you don’t have one at hand, create a new app with the Angular CLI.
mobiscroll config angular -version=5When installing Mobiscroll you will be prompted to log in. Use the email address and password you’ve set up in the first step.
Now that you have Mobiscroll installed, let’s set up the scheduler. There are three pieces to it, the Component, Template and Module.
Component
To get started make sure to import the MbscEventCalendarOptions and MbscCalendarEvent:
import { MbscEventcalendarOptions, MbscCalendarEvent } from '@mobiscroll/angular';After the import we will set up the options object that we’ll pass to the event calendar template.
eventSettings: MbscEventcalendarOptions = {
    theme: 'ios',
    themeVariant: 'light',
    clickToCreate: true,
    dragToCreate: true,
    dragToMove: true,
    dragToResize: true,
    responsive: {
        xsmall: {
            view: { schedule: { type: 'day' } }
        },
        custom: {
            // Custom breakpoint
            breakpoint: 600,
            view: { schedule: { type: 'week' } }
        }
    }
};
Alternatively, the options can be set inline when writing the template:
<mbsc-eventcalendar
    [view]="{schedule: { type: 'week' }}"
    [clickToCreate]="true"
    [dragToCreate]="true"
    [dragToMove]="true"
    [dragToResize]="true"
></mbsc-eventcalendar>
Now let’s dig into the options we pass.
- Setting the theme: The
themecan beios,material,windowsorautowhereautosets the theme based on the system. ThethemeVariantcan belight,darkorautowhereautosets the variant based on system settings. Learn more about theming and play with the different settings. - Configuring drag & drop: The four
clickToCreate,dragToCreate,dragToMoveanddragToResizeprovide granular control over the drag & drop experience. See how turning the different options influence the calendar. - Setting up responsiveness: For a weekly schedule we’d only need to set the view option like
view: { schedule: { type: 'week' } }, however in our current example we are setting up a responsive behavior that switches between a weekly scheduler and a daily scheduler based on screen width. With the configuration above you'll get a weekly scheduler on screens with a width of 600px and up. For smaller screens a daily schedule will be shown.
After the responsive view is configure we will need to load some events. You can see a couple of different examples and sources here, but for now we’ll use a demo API and load the events into the myEvents object which we'll later pass in the template.
myEvents: MbscCalendarEvent[] = []; ngOnInit(): void {
    this.http.jsonp<MbscCalendarEvent[]>('https://trial.mobiscroll.com/events/?vers=5', 'callback').subscribe((resp) => {
        this.myEvents = resp;
    });
}
The API call will return an array of event objects that can be directly passed to the event calendar. start, end, text, color are base properties. Besides these any other property can be passed and parsed.
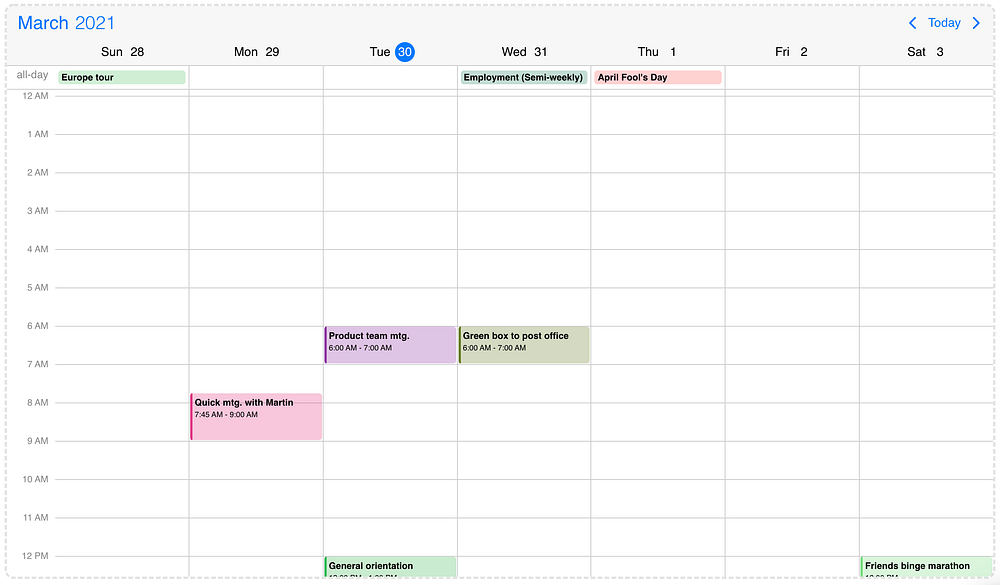
{ "start":"2021-03-30T07:00:00.000Z","end":"2021-03-30T08:00:00.000Z","text":"Product team mtg.","color":"#f67944" }Learn more about the event object.
Template
The actual event calendar needs to be added to the template with all of its options.
<mbsc-eventcalendar [data]="myEvents" [options]="eventSettings"></mbsc-eventcalendar>myEvents is passed to the data option while eventSettings are passed to options. Both variables are defined in the Component. Alternatively you can set the options individually in the template.
Module
Depending on your setup you will need to import modules you’ll use in the accompanying module for your component.
import { MbscModule } from '@mobiscroll/angular';
import { HttpClientJsonpModule } from '@angular/common/http';
The MbscModule is for Mobiscroll and the HttpClientJsonpModule module is for loading the events from an API using jsonp.
CSS
CSS is optional, at least it is not necessary to write CSS for the scheduler to render correctly. There is however one thing we will add in order to get to the desired outcome — make the scheduler fill the entire screen. For that to work, we’ll need to set all parent containers of the event calendar to height: 100% (including body and html). Since we started out with a basic Angular CLI app we'll also remove the margins from the top container so our CSS will look something like this:
body, html { height: 100%; margin: 0; }The result
After all of that your component should look something like this 👇
And this is how your code should look like 👇
app.component.ts
import { Component, OnInit } from '@angular/core';
import { MbscEventcalendarOptions, MbscCalendarEvent } from '@mobiscroll/angular';
import { HttpClient } from '@angular/common/http'; @Component({
    selector: 'app-root',
    templateUrl: './app.component.html'
})
export class AppComponent implements OnInit {     constructor(private http: HttpClient) {}     myEvents: MbscCalendarEvent[] = [];     eventSettings: MbscEventcalendarOptions = {
        theme: 'ios',
        themeVariant: 'light',
        clickToCreate: true,
        dragToCreate: true,
        dragToMove: true,
        dragToResize: true,
        responsive: {
            xsmall: {
                view: {
                    schedule: {
                        type: 'day'
                    }
                }
            },
            custom: { // Custom breakpoint
                breakpoint: 600,
                view: {
                    schedule: {
                        type: 'week'
                    }
                }
            }
        }
    };     ngOnInit(): void {
        this.http.jsonp<MbscCalendarEvent[]>('https://trial.mobiscroll.com/events/?vers=5', 'callback').subscribe((resp) => {
            this.myEvents = resp;
        });
    }
}
app.component.html
<mbsc-eventcalendar [data]="myEvents" [options]="eventSettings"></mbsc-eventcalendar>app.module.ts
import { BrowserModule } from '@angular/platform-browser';
import { NgModule } from '@angular/core';
import { HttpClientJsonpModule } from '@angular/common/http';
import { FormsModule, ReactiveFormsModule } from '@angular/forms';
import { MbscModule } from '@mobiscroll/angular';
import { AppComponent } from './app.component'; @NgModule({
    declarations: [
        AppComponent
    ],
    imports: [
        BrowserModule,
        MbscModule,
        FormsModule,
        ReactiveFormsModule,
        HttpClientModule,
        HttpClientJsonpModule
    ],
    bootstrap: [
        AppComponent
    ]
})
export class AppModule { }
Useful links
Mobiscroll scheduler for Angular: https://demo.mobiscroll.com/angular/scheduler/
Interactive demo to the responsive scheduler: https://demo.mobiscroll.com/angular/scheduler/responsive-day-week-schedule
Mobiscroll scheduler available for other frameworks:
Originally published at https://blog.mobiscroll.com on April 2, 2021.